Ready to start crafting? Explore our desktop laser systems and bring your creative ideas to life. Get Your Free Quote

Glowforge Aura Learning Center

Material settings, starter project files, video tutorials, and practical guides to help you get the most out of your Glowforge Aura craft laser. Whether you just unboxed or have been cutting for months, there is something here for you.

Getting Started with Your Glowforge Aura

New to laser cutting? Follow these four steps and you will be making your first project in under an hour.

1

Unbox & Connect

Remove the machine from the box, attach the exhaust hose to a window vent or inline filter, and plug in the power cable. Connect to your home Wi-Fi network using the Glowforge app on your phone or browser. Total time: 15-25 minutes.

2

Upload a Design

Open app.glowforge.com on any computer or tablet. Upload an SVG, PNG, or PDF file. The drag-and-drop interface shows a live camera view of your material so you can position the design exactly where you want it.

3

Choose Settings

If using Proofgrade materials, the machine reads the QR code and loads tested settings automatically. For custom materials, select from the community settings library or enter manual speed, power, and pass count values.

4

Press Print

Hit the glowing button on the machine. Watch through the lid as the laser traces your design. When done, open the lid, remove your finished piece, and start the next one. Your first project is complete.

Material Settings Reference

Tested cut and engrave settings for the most common materials. These values are starting points; fine-tune based on your specific material batch and desired finish.

Material Thickness Operation Speed Power Passes Notes
Basswood Plywood 3mm (1/8") Cut 168 Full 1 Proofgrade auto-detected. Clean cut with minimal charring.
Basswood Plywood 3mm (1/8") Engrave 1000 65% 1 Use 340 LPI for balanced speed and detail. Increase to 450 LPI for photo engraving.
Birch Plywood 3mm (1/8") Cut 155 Full 1 Harder than basswood; reduce speed by 10% for clean through-cuts.
Cast Acrylic 3mm (1/8") Cut 170 Full 1 Produces flame-polished edges. Extruded acrylic gives frosted edges.
Vegetable-Tanned Leather 2mm Cut 200 Full 1 Test on scrap first. Chrome-tanned leather releases toxic chromium fumes and must not be processed.
Cardstock 0.3mm Cut 400 25% 1 Pin down edges to prevent movement from air assist.
Cork Sheet 3mm Engrave 800 40% 1 Cork engraves well but chars easily at high power. Keep power under 50%.

These settings are approximate and based on Aura Pro (10W) testing. Results vary with material brand, humidity, grain direction, and machine calibration. Always run a small test cut on scrap before committing to a full sheet. Never process PVC, vinyl, polycarbonate, or ABS in a Glowforge Aura.

Video Tutorials

Step-by-step walkthroughs from our team covering setup, common projects, and advanced techniques.

Glowforge Aura unboxing and first setup video tutorial 12:34

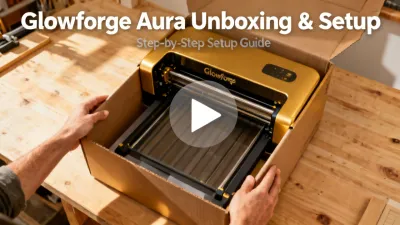
Unboxing & First Setup

Complete walkthrough from opening the box to your first test cut. Covers ventilation options, Wi-Fi setup, and calibration steps.

How to make laser cut earrings with Glowforge Aura tutorial 18:22

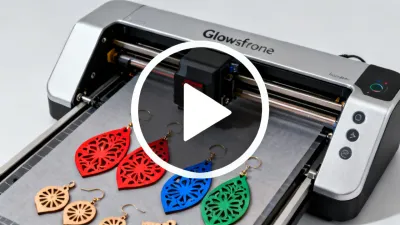
Making Laser Cut Earrings

Design earring shapes in Canva, import to Glowforge, and cut from 3mm basswood. Includes tips on painting, sealing, and attaching hardware.

Leather engraving guide for Glowforge Aura tutorial 15:47

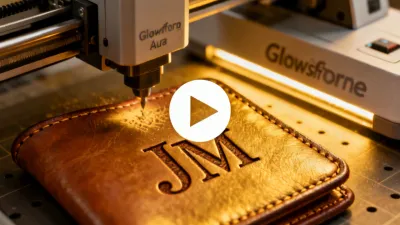
Leather Engraving Guide

Settings for vegetable-tanned leather, how to test on scrap, handling curved surfaces, and finishing techniques for professional results.

Using the Glowforge Aura Pro passthrough slot tutorial 9:15

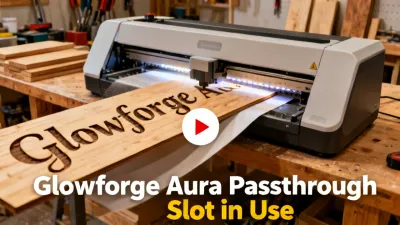
Passthrough Slot for Large Projects

How to use the Aura Pro passthrough for pieces longer than the bed. Alignment techniques and tips for seamless multi-section cuts.

Acrylic sign making with Glowforge Aura tutorial 14:08

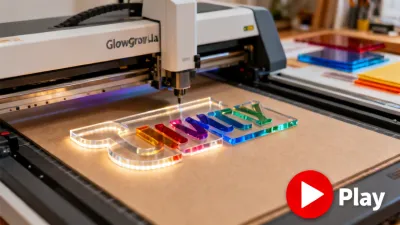
Acrylic Signs with LED Bases

Cut and engrave acrylic panels for edge-lit LED signs. Covers acrylic types, masking techniques, and pairing with LED bases.

Glowforge Aura cleaning and maintenance guide tutorial 8:56

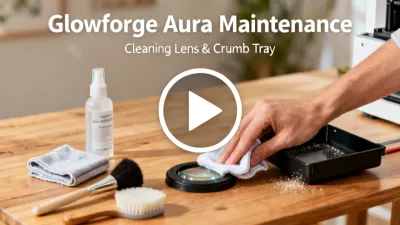
Cleaning & Maintenance

Monthly maintenance routine: cleaning the lens, mirror, lid camera, crumb tray, and exhaust fan. Extends machine life and prevents cutting quality loss.

Downloadable Resources

Free design files, templates, and reference guides to accelerate your learning curve.

Starter Project Pack

10 beginner-friendly SVG files including earrings, keychains, coasters, bookmarks, and a box with finger joints. Ready to cut on 3mm plywood or acrylic.

SVG files, 2.4 MB Request Download

Material Settings Cheat Sheet

Printable PDF reference card with tested settings for 25 common materials. Pin it next to your machine for quick access during production runs.

PDF, 1.1 MB Request Download

Laser Business Starter Guide

28-page PDF covering pricing strategies, Etsy shop setup, material sourcing, production workflow, and common mistakes to avoid when starting a laser craft business.

PDF, 3.8 MB Request Download

Frequently Asked Questions

What is the Glowforge Aura wattage?

The Aura Compact uses a 6W diode laser module. The Aura Pro upgrades to a 10W diode module. The Aura Studio uses a 40W sealed CO2 laser tube. Diode lasers and CO2 lasers use different wavelengths (445nm vs 10.6μm), so comparing wattage directly between the two types is misleading. A 40W CO2 laser cuts significantly faster and thicker than a 10W diode because the CO2 wavelength is absorbed more efficiently by wood and acrylic.

Can the Glowforge Aura cut metal?

No. The Aura uses diode and CO2 lasers, which cannot cut or deeply engrave bare metals. You can engrave the surface of anodized aluminum, painted metals, and coated surfaces (the laser removes the coating to reveal the metal underneath). For cutting or deep engraving on bare metals, you need a fiber laser system operating at a 1064nm wavelength.

What materials should I never put in the Glowforge Aura?

Never process PVC (vinyl), polycarbonate (Lexan), ABS plastic, fiberglass, or carbon fiber. PVC releases hydrochloric acid gas when lasered, which is toxic to breathe and corrodes the machine optics and metal components. Polycarbonate and ABS produce toxic fumes and tend to catch fire. Epoxy resins and materials containing adhesives with unknown composition should also be avoided. When in doubt, check the manufacturer safety data sheet (SDS) for your material.

How long does the laser tube or module last?

The diode laser modules in the Aura Compact and Pro are rated for approximately 10,000 hours of active lasing time. At typical hobby use (2 hours per day), that translates to roughly 13 years. The CO2 tube in the Aura Studio is rated for approximately 2,000-4,000 hours depending on operating power. Replacement tubes are available from Glowforge support. Tube life decreases faster at sustained full-power operation.

Does the Glowforge Aura require ventilation?

Yes. All laser cutting produces smoke and fumes that must be exhausted from the workspace. The Aura has a built-in exhaust port that connects to a 4" duct hose. You can vent through a window using the included window kit, or use an inline air filter unit for rooms without window access. The Glowforge Air Filter (sold separately) is designed for this purpose. Running the machine without ventilation will fill the room with smoke and deposit residue on the optics, reducing cut quality.

What file formats does the Glowforge accept?

The Glowforge app accepts SVG (recommended for vector cuts and scores), PNG and JPEG (for raster engraving), PDF, and BMP files. For best results with cut operations, use vector files with stroke colors to define cut, score, and engrave operations. Popular design tools that export compatible files include Adobe Illustrator, Inkscape (free), Canva, Affinity Designer, and CorelDRAW.

Is the Glowforge Aura safe for classroom use?

The Aura Compact is an enclosed Class 1 laser product under IEC 60825-1, the safest laser classification. The beam is fully contained during operation, so no safety goggles are required. An interlock switch automatically disables the laser if the lid is opened during a job. It is safe for supervised classroom use in K-12 and higher education settings. Proper ventilation is still required.

How does the Glowforge Aura compare to CO2 lasers from other brands?

The Aura Compact and Pro use diode lasers, which are lower power but more compact and affordable than CO2 systems. They are best suited for thin materials (up to 3-6mm). The Aura Studio uses a 40W CO2 tube, comparable to entry-level CO2 machines from Epilog, Trotec, and Dremel. The main differentiator is the cloud-based software and camera alignment system, which simplifies the workflow at the cost of requiring an internet connection. Machines from Thunder Laser and OMTech offer larger bed sizes at similar price points but with steeper learning curves.

Ready to Start Creating?

Get a personalized recommendation for the right Glowforge Aura model based on your projects, materials, and production volume. Our team responds within one business day.

Get Your Free Quote